B2B User Registration in SAP Commerce
What’s the best B2B eCommerce registration process for your business? The answer depends on many factors, but there’s one thing to understand right away: B2B registration is unlike B2C. In retail eCommerce, adding a new user is simple — you just let them sign up. Since you won’t accept an order without a viable credit card, you’re not too concerned about vetting at the signup point.
For manufacturers doing SAP B2B eCommerce, new user requirements are far more complicated. You don’t want consumers mistakenly signing up for your secure-access portal. Even legitimate companies might not be a good fit depending on your target customer profile.
In this article, we’ll give you the how to register a new customer. Then we’ll give you different processes involved to get a new user fully registered.
As part of B2Buser registration, multiple steps have been involved
- Register form (Fill the required details)
- Sending notifications to Approver for an approval the user
- Approve or Reject by Approver
- Assigning proper B2B unit to the user (in case of approve)
- User will be deleted and re-created as B2BCustomer type
- Reset password emails
- Login to site and explore
Here we are using 2211 version of Hybris which is latest version and site will be Power tools site. In this site will give you walkthrough of user registration, how the flow will happen in backend and how we can approve the users from Backoffice.
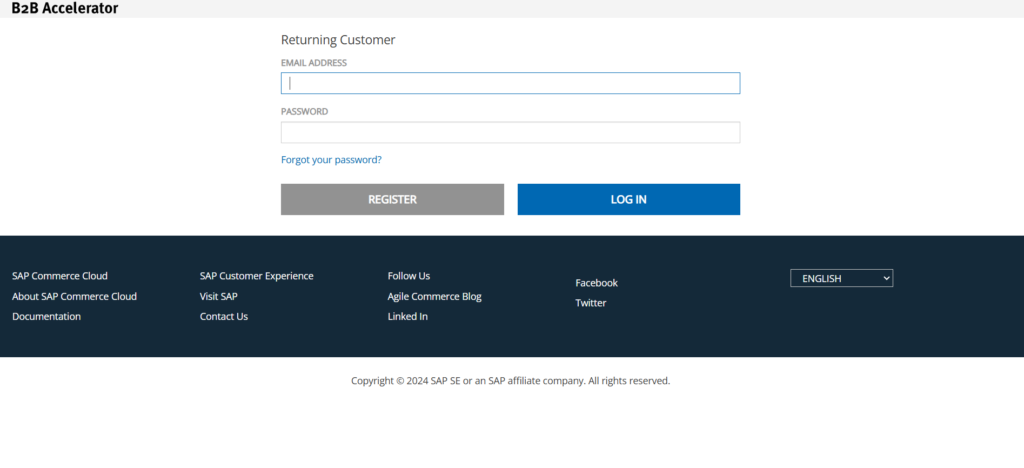
As soon as we done the setup of 2211, if you try to access the site it will land into login page until unless you register or login with account can’t access the full site. So first we need to register a user in the site.
Below is the screenshot how homepage will look like without login
This is the controller B2BRegistrationController it gets call when we click on register button.
Controller Method –
Below is the method to submit the form data to façade layer
@RequestMapping(method = RequestMethod.POST)
public String submitRegistration(final RegistrationForm form, final BindingResult bindingResult, final Model model,
                                 final HttpServletRequest request, final HttpSession session, final RedirectAttributes redirectModel)
        throws CMSItemNotFoundException
{

    populateModelCmsContent(model, getContentPageForLabelOrId(getRegistrationCmsPage()));
    model.addAttribute(form);

    getRegistrationValidator().validate(form, bindingResult);
    if (bindingResult.hasErrors())
    {
        return getRegistrationView();
    }

    try
    {
        b2bRegistrationFacade.register(convertFormToData(form));
    }
    catch (final CustomerAlreadyExistsException e)
    {
        LOG.error("Failed to register account. Account already exists.");
        GlobalMessages.addErrorMessage(model, Localization.getLocalizedString(REGISTER_ACCOUNT_EXISTING));
        return getRegistrationView();
    }
    catch (final RegistrationNotEnabledException e)
    {
        LOG.error("Failed to register account. Registration is not enabled.");
        return getRegistrationView();
    }
    catch (final RuntimeException re)
    {
        LOG.error("Failed to register account. Encountered an internal server error.");
        return getRegistrationView();
    }

    GlobalMessages.addFlashMessage(redirectModel, GlobalMessages.INFO_MESSAGES_HOLDER, REGISTER_SUBMIT_CONFIRMATION);
    return REDIRECT_PREFIX + this.configurationService.getConfiguration().getString(DEFAULT_LOGIN_URI_CONFIG);
}
Inside the controller we are converting RegistrationForm to B2BRegistrationData
This is the implementation class DefaultB2BRegistrationFacade of facades, here first will check user id already exists or not, if exist then will abort the current process by using transactions.
Façade Method –
Below is the method where data takes from controller and check the user exist condition, converting model and workflow launch
@Override
public void register(final B2BRegistrationData data) throws CustomerAlreadyExistsException, RegistrationNotEnabledException
{
    Final boolean isRegistrationEnabled = baseSiteService.getCurrentBaseSite().isEnableRegistration();

    if (!isRegistrationEnabled)
    {
        LOG.debug("Registration is not enabled!");

        throw new RegistrationNotEnabledException("Registration is not enabled!");
    }

    final Transaction tx = Transaction.current();
    tx.begin();

    boolean success = false;

    try
    {
// Check if a user using the same email exist, if so we need to abort the current operation!

       final boolean userExists = userService.isUserExisting(data.getEmail().toLowerCase(LocaleHelper.getPersistenceLocale()));
        if (userExists)
        {
            LOG.debug(String.format("user with uid '%s' already exists!",
                    data.getEmail().toLowerCase(LocaleHelper.getPersistenceLocale())));
            throw new CustomerAlreadyExistsException(String.format("User with uid '%s' already exists!",
                    data.getEmail().toLowerCase(LocaleHelper.getPersistenceLocale())));
        }
// Save the customer. At this point, the customer is saved to generate emails and initiate the workflow. This customer will be deleted as part of the
// cleanup of the workflow IF he is rejected. If approved, the customer will be deleted by the "approve workflow action" and will be re-created
// as a B2BCustomer and assigned to the proper B2BUnit. At this stage, we can't create a B2BCustomer since we don't even have a B2BUnit (organization!).
// Save the registration model so that it is accessible to the workflow actions. The registration model will be deleted as part of the cleanup
// of the workflow.

        final CustomerModel customer = toCustomerModel(data);
        final B2BRegistrationModel registration = toRegistrationModel(data);
        registration.setCustomer(customer);
        modelService.saveAll(customer, registration);
        final WorkflowTemplateModel workflowTemplate = workflowTemplateService.getWorkflowTemplateForCode(
                B2BConstants.Workflows.REGISTRATION_WORKFLOW);
        LOG.debug(String.format("Created WorkflowTemplateModell using name '%s'", B2BConstants.Workflows.REGISTRATION_WORKFLOW));

        // Start the workflow

        b2bRegistrationWorkflowFacade.launchWorkflow(workflowTemplate, registration);
        tx.commit();
        success = true;
    }

    finally
    {
        if (!success)
        {
            tx.rollback();
        }
    }
}
B2BRegistrationData will be convert to CustomerModel and B2BRegisterModel and will set required information and save the models.
/**
 * Converts a {@link B2BRegistrationData} into a {@link CustomerModel}. Only keeps the most important fields to
 * generate emails, the rest is ignored as this customer is to be deleted as part of the workflow execution
 *
 * @param data
 *           The registration data
 * @return An unsaved instance of {@link CustomerModel}
 */
protected CustomerModel toCustomerModel(final B2BRegistrationData data)
{
    final CustomerModel model = modelService.create(CustomerModel.class);

    model.setName(WordUtils.capitalizeFully(data.getName()));
    model.setUid(data.getEmail());
    model.setLoginDisabled(true);
    model.setCustomerID(UUID.randomUUID().toString());
    model.setSessionLanguage(commonI18NService.getCurrentLanguage());
    model.setSessionCurrency(commonI18NService.getCurrentCurrency());
// Title is optional

    if (StringUtils.isNotBlank(data.getTitleCode()))
    {
        final TitleModel title = userService.getTitleForCode(data.getTitleCode());
        model.setTitle(title);
    }
    return model;

}
/**
 * Converts a {@link B2BRegistrationData} into a {@B2BRegistrationModel}
 *
 * @param data
 *           The registration data
 * @return An unsaved instance of type {@B2BRegistrationModel}
 */
protected B2BRegistrationModel toRegistrationModel(final B2BRegistrationData data)
{

    final B2BRegistrationModel model = modelService.create(B2BRegistrationModel.class);
// Use reflection to copy most properties and ignore these since we want to manage them manually
    BeanUtils.copyProperties(data, model, new String[]
            { "titleCode", "companyAddressCountryIso", "companyAddressRegion", "baseStore", "cmsSite", "currency", "language" });
// Title is optional

    if (StringUtils.isNotBlank(data.getTitleCode()))
    {
        final TitleModel title = userService.getTitleForCode(data.getTitleCode());
        model.setTitle(title);

    }
// Country and region are optional

    if (StringUtils.isNotBlank(data.getCompanyAddressCountryIso()))
    {
        final CountryModel country = commonI18NService.getCountry(data.getCompanyAddressCountryIso());
        model.setCompanyAddressCountry(country);
        if (StringUtils.isNotBlank(data.getCompanyAddressRegion()))
        {
            final RegionModel region = commonI18NService.getRegion(country, data.getCompanyAddressRegion());
            model.setCompanyAddressRegion(region);
        }
    }
// Get these from current context
    model.setBaseStore(baseStoreService.getCurrentBaseStore());
    model.setBaseSite(baseSiteService.getCurrentBaseSite());
    model.setCurrency(commonI18NService.getCurrentCurrency());
    model.setLanguage(commonI18NService.getCurrentLanguage());

    return model;
}
Now the workflow process will start, first will get the registration work flow by using code B2BConstants.Workflows. REGISTRATION_WORKFLOW
final WorkflowTemplateModel workflowTemplate =
workflowTemplateService.getWorkflowTemplateForCode(
        B2BConstants.Workflows.REGISTRATION_WORKFLOW);
LOG.debug(String.format("Created WorkflowTemplateModell using name '%s'",
B2BConstants.Workflows.REGISTRATION_WORKFLOW));
// Start the workflow
        b2bRegistrationWorkflowFacade.launchWorkflow(workflowTemplate, registration);
Once we get the registration workflow then will launch that workflow. Once it launch the workflow it will create the workflow then start the workflow automatically.
This is the class DefaultB2BRegistrationWorkflowFacade where workflow creating and starting with workflow template and b2bregistrationmodel
Below is the method for creating and start workflows
@Override
public void launchWorkflow(final WorkflowTemplateModel workflowTemplateModel, final B2BRegistrationModel b2bRegistrationModel)
{
    final WorkflowModel workflow = workflowService.createWorkflow(workflowTemplateModel, b2bRegistrationModel,
    userService.getAdminUser());
    modelService.save(workflow);
    if (LOG.isDebugEnabled())
    {
        LOG.debug(String.format("Starting workflow for customer with email '%s' and organization (company name) '%s'.",
        b2bRegistrationModel.getEmail(), b2bRegistrationModel.getCompanyName()));
    }
    workflowProcessingService.startWorkflow(workflow);
}
In this process it will create one workflow with workflow actions.
Important Note –
Once customer is created in the site firstly customer will create as a Customer type and saved to DB then generate emails and initiate the workflow. This customer will be deleted as part of the clean-up of the workflow if he (Approver) is rejected. If approved, the customer will be deleted by the “approve workflow action” and will be re-created as a B2BCustomer and assigned to the proper B2BUnit. At this stage, we can’t create a B2BCustomer since we don’t even have a B2BUnit (organization!)
With a user who belongs to the b2bregistrationapprovergroup group (use the default user of RegApproverA with its password).
After starting the workflow in this class DefaultWorkflowProcessingService actions will be create and process based on the status by approver.
Below is the method where workflow begins
public boolean startWorkflow(final WorkflowModel workflowModel) {
    if (this.modelService.isNew((Object) workflowModel)) {
        throw new IllegalArgumentException("Workflow model " + workflowModel + " has to be saved before start");
    }
    boolean startFlagFound = false;
    final Collection<WorkflowActionModel> actions = workflowModel.getActions();
    for (WorkflowActionModel action : actions) {
        if (action.getActionType() == WorkflowActionType.START) {
            this.setPausedStatus(workflowModel);
            this.modelService.refresh((Object) workflowModel);
if (DefaultWorkflowProcessingService.LOG.isDebugEnabled()) {
DefaultWorkflowProcessingService.LOG.debug("After: " + workflowModel.getStatus());
}
this.activate(action);
startFlagFound = true;
}
}
if (!startFlagFound) {
for (final WorkflowActionModel action : actions) {
if (action.getPredecessors().size() > 0) {
this.setPausedStatus(workflowModel);
this.activate(workflowModel);
this.modelService.refresh((Object) workflowModel);
}
}
}
return startFlagFound;
} Register form will look like in B2B site
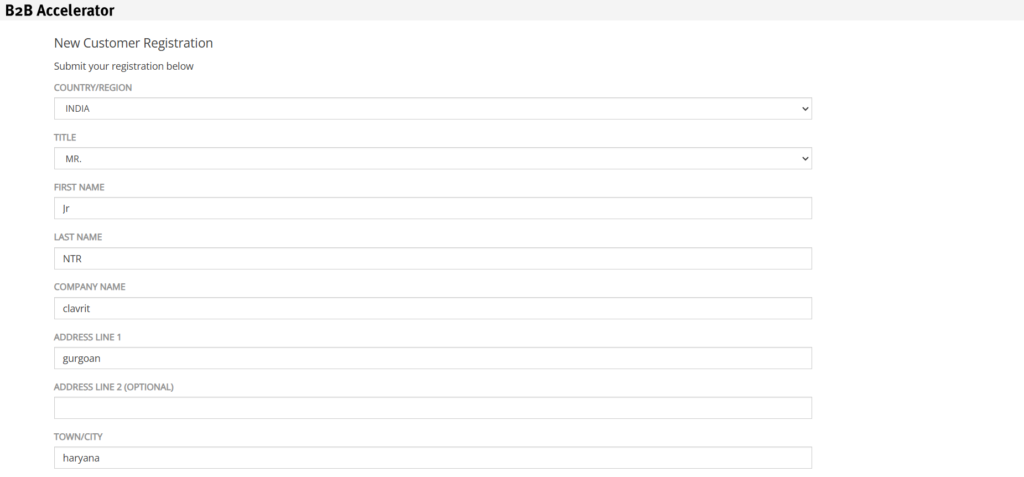
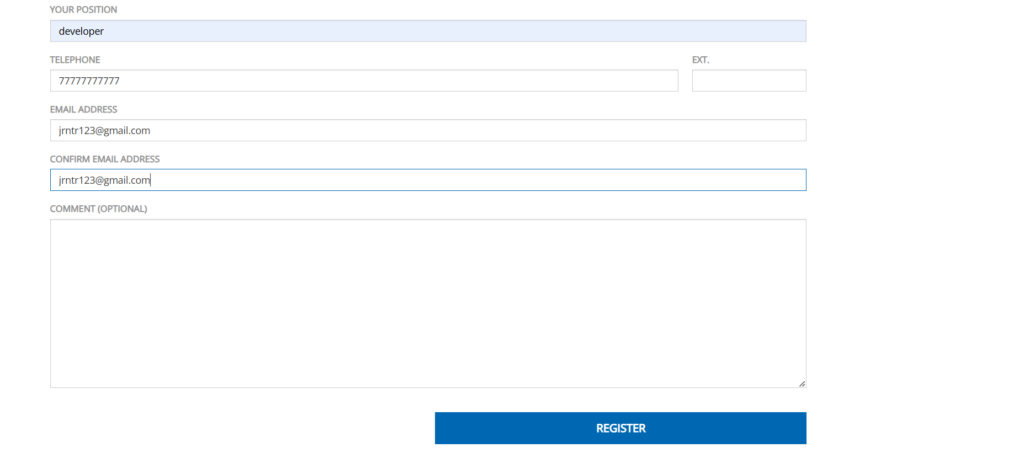
. After clicking on Register button user will be saved in DB as customer type.
Parallelly workflows will be start and sends an email notification to approver and customer.
Approver received email regarding approval the user.
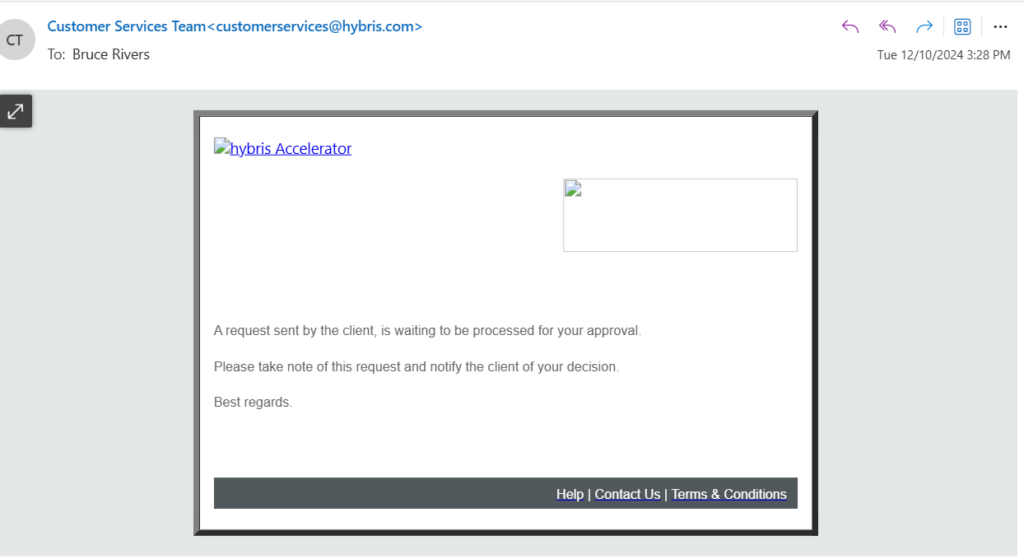
Customer will notify the submit the request to approver.

New registrations are approved or rejected through the Backoffice Administration Cockpit by a merchant user who belongs to the b2bregistrationapprovergroup group.
Emails are sent when the following stages are completed:
- The request is submitted
- The request is approved
- The request is rejected: the merchant approver must provide a reason
By default, new users are assigned to the role of B2B Customer. The approver must assign a unit for the new user and the company’s B2B Administrator can then modify permission access.
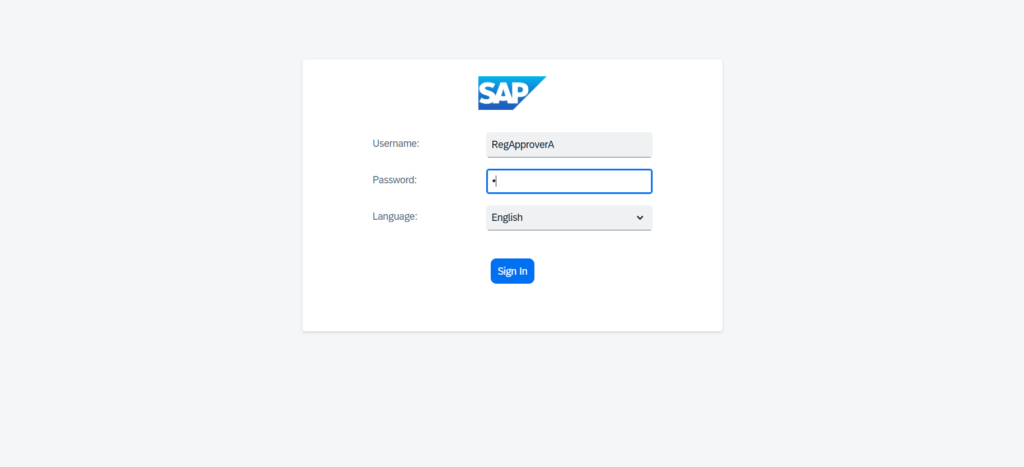
Log into the Backoffice Administration Cockpit (http://localhost:9001/backoffice) with a user who belongs to the b2bregistrationapprovergroup group (use the default user of RegApproverA with its password).
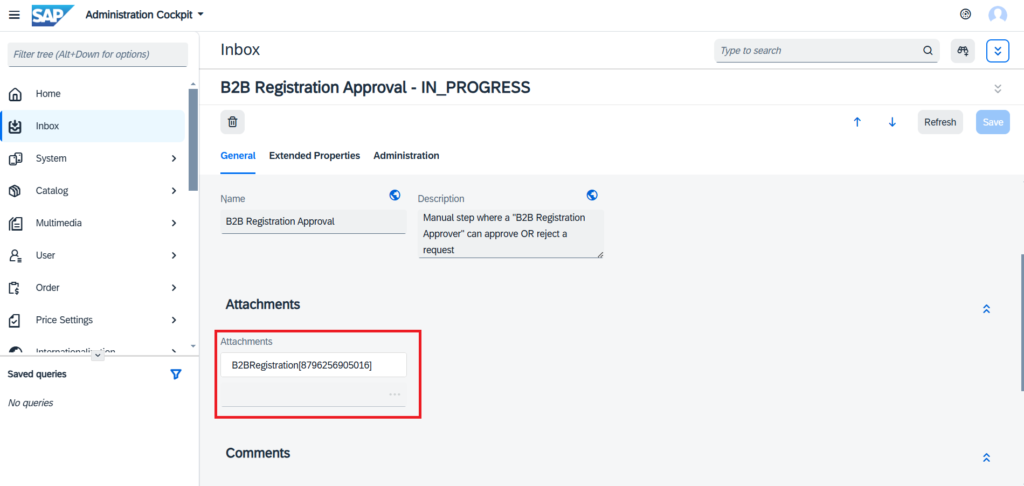
In the navigation bar, click Inbox to view the tasks assigned to the approver. If any registrations are waiting approval, they appear in the list under the name B2B Registration Approval.

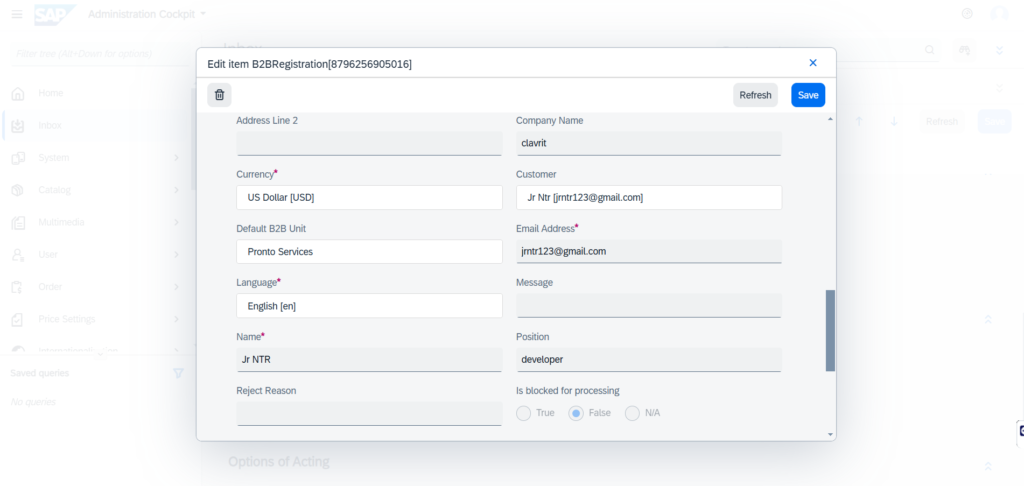
For the selected task, look to the bottom portion of the window, open General Attachments, and double-click B2BRegistration Approval
In the Edit Item window, under the unbound heading, select an appropriate unit from the Default B2B Unit. Alternatively, click to open an advanced search window.
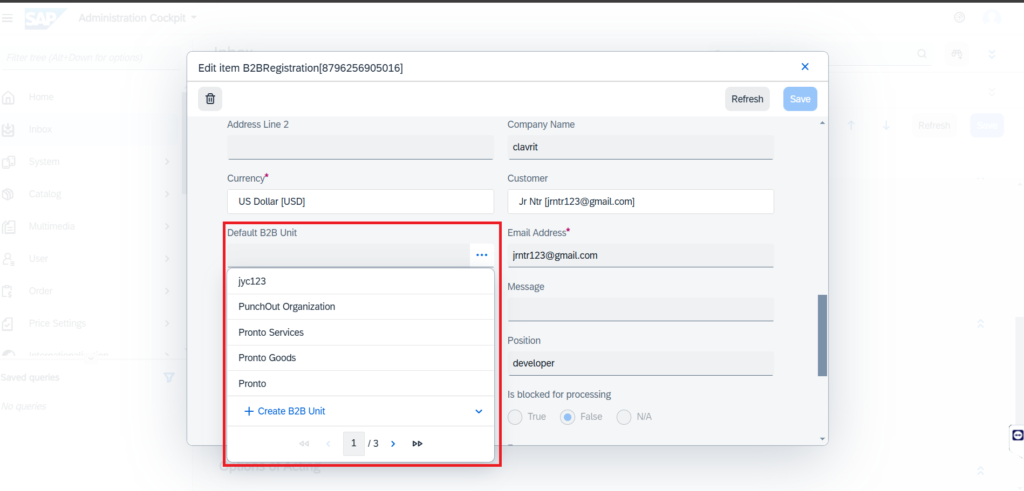
Now click on save after that page will redirect to B2B registration approval window, In the General tab under the Options of Acting heading, select Approve or Reject.
Note:: Make sure before approving the user should assign proper B2B unit to the user otherwise approve will not work.
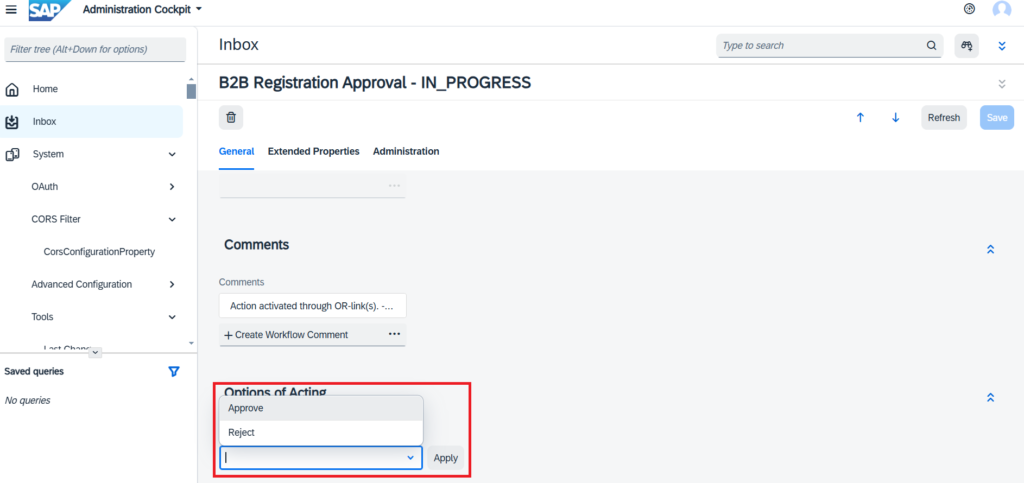
Select Approve option and click on Apply button the save the changes.
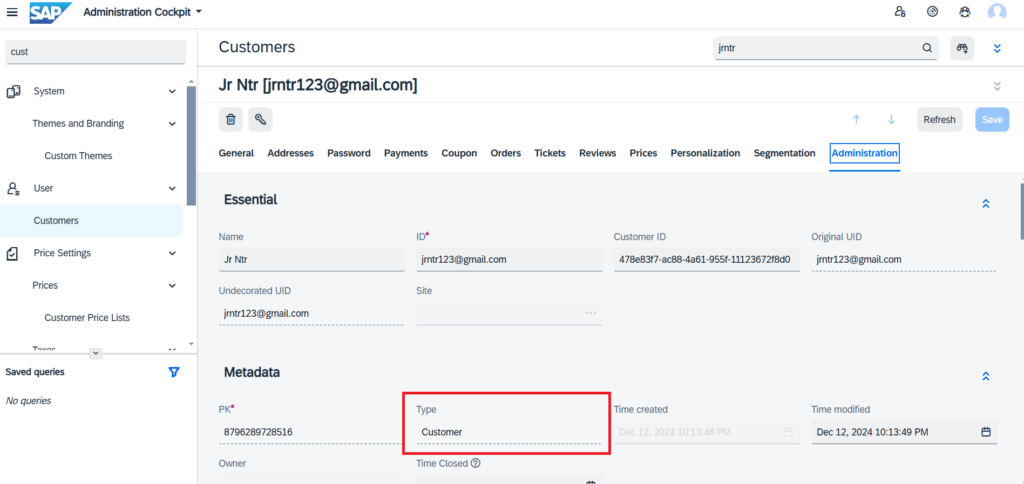
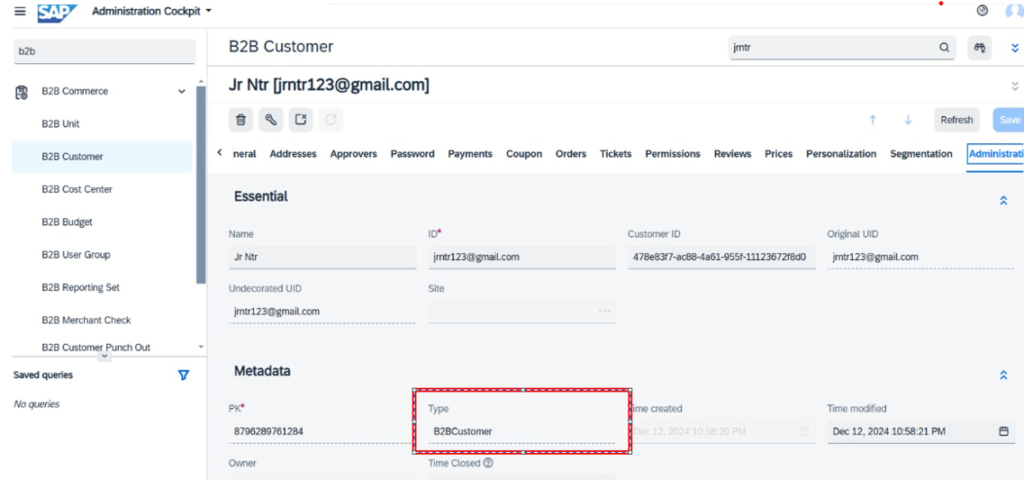
After Approve the user, user (customer type user) will be hard delete from DB and will re-create as B2Bcustomer. This is the class RegistrationApprovedAutomatedWorkflowTemplateJob where this logic will be performed
This is the method
@Override
public WorkflowDecisionModel perform(final WorkflowActionModel workflowAction)
{
    final B2BRegistrationModel registration = getRegistrationAttachment(workflowAction);
    final CustomerModel customer = getCustomer(registration);
    final B2BCustomerModel b2BCustomer = createB2BCustomerModel(customer, registration);
//Delete temporary customer attached to workflow
    getModelService().remove(customer);
    registration.setCustomer(b2BCustomer);
//persist the newly created b2bCustomer
    getModelService().saveAll(b2BCustomer, registration);
    return defaultDecision(workflowAction);
}

protected B2BCustomerModel createB2BCustomerModel(final CustomerModel customer, final B2BRegistrationModel registration)
{
    final B2BCustomerModel b2bCustomer = getModelService().create(B2BCustomerModel.class);
    b2bCustomer.setEmail(getDefaultCustomerEmailResolutionService().getEmailForCustomer(customer));
    b2bCustomer.setName(customer.getName());
    b2bCustomer.setTitle(customer.getTitle());
    b2bCustomer.setUid(customer.getUid());
    b2bCustomer.setCustomerID(customer.getCustomerID());
    b2bCustomer.setDefaultB2BUnit(registration.getDefaultB2BUnit());
    b2bCustomer.setSite(customer.getSite());

    return b2bCustomer;
}
We can see below screenshot which user re-created and saved as B2Bcustomer type
After the save changes, email will be trigger to the customer to reset the password saying Registration Approved and reset the password
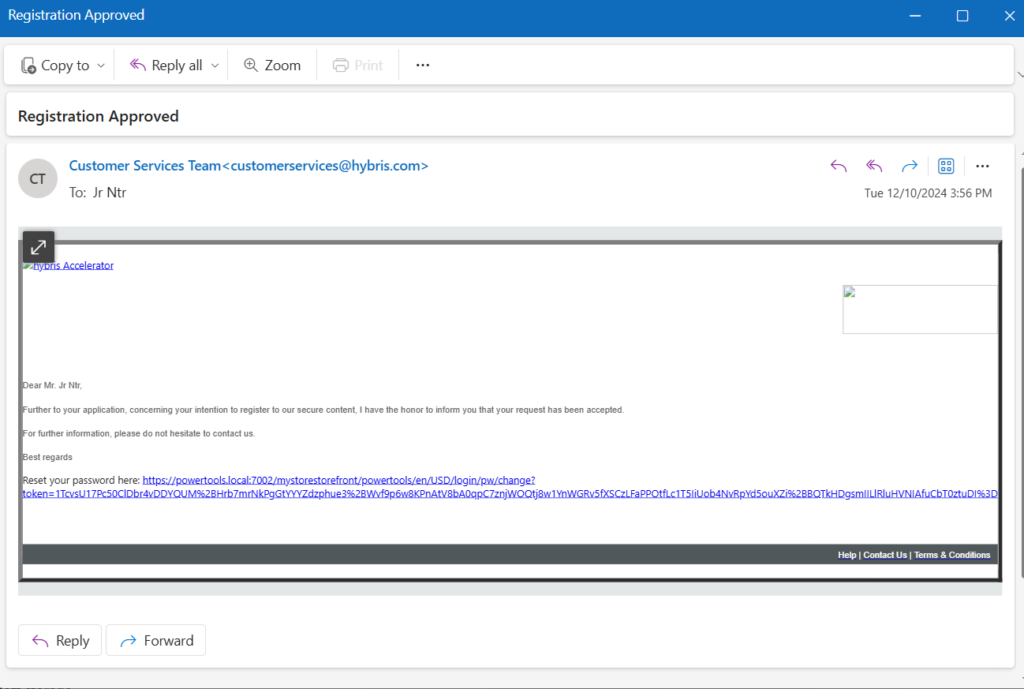
Once we click on the reset password link this will redirect to powertools site reset password page
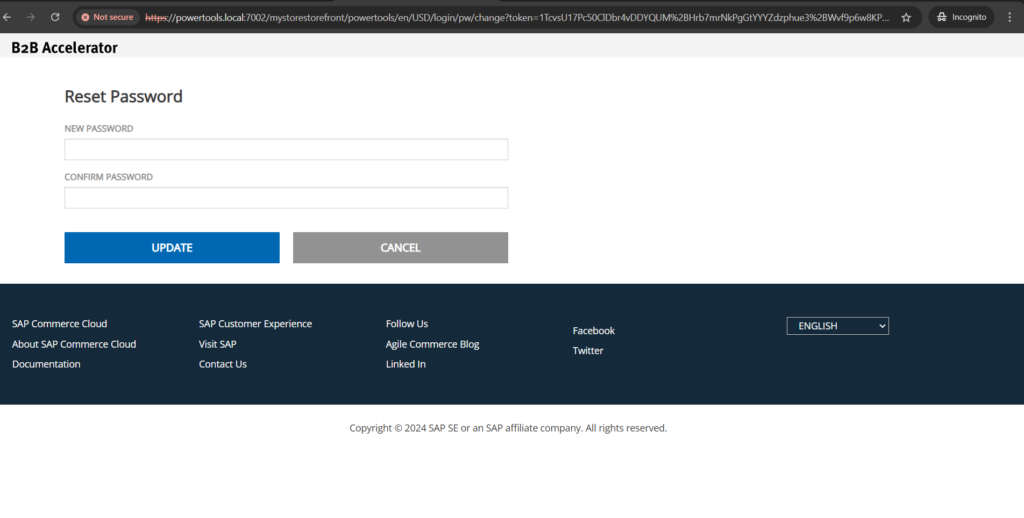
Now provide the password and click on Update button, you can see prompt message like Success You can now login using your new password.
Now login into your with your new password and will be landing into homepage of powertools B2Bsite
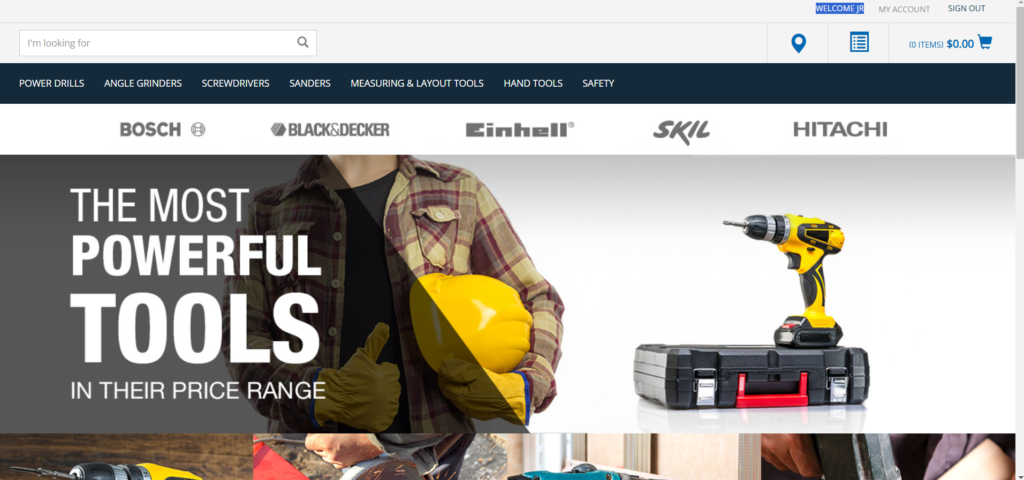
Now you can explore the site with products, cart, checkout and orders.