In SAP Hybris Commerce, “localization” refers to the capability of managing data for different locales, languages, and countries. This is particularly important for global businesses that need to provide content, products, and services tailored to specific regions across the globe.
Internally whenever we creating any item type and in that any one of the attribute is localized then the corresponding LP (Localized Property) table will be created. The Localized Property (LP) table is a mechanism in Hybris that enables the localization of attributes within an item type. It is used to store values for a specific attribute based on different languages or locales. Each item type having any of the attributes that needs to be localized has a corresponding LP table to store the localized values.
In this article we will go through two implementations:
1. Create a new itemtype with three attributes, and one of the attribute is localized. And validate it using Administrative Console (HAC) and Backoffice.
2. Add a new localized attribute in product itemtype and display the same on storefront.
Implementation 1:
1.First we need to create one itemtype in *core-items.xml file.
After performing the above step do ant all (it will generate corresponding Model class (StudentModel) and start the server and, perform the system update (the corresponding table (StudentDetails) and corresponding LP (StudentDetailslp) table will be created in the Database.
For normal attributes (studentID, studentFirstName) the setters and getters will be generated and for localized attribute (studentLastName) there are two setters and getters will be created. One is for normal and another one is for Localized (having additional parameter of type Locale as highlighted in the below code snippet).
   @Accessor(qualifier = "studentID", type = Accessor.Type.GETTER)
   public String getStudentID()
   {
   return getPersistenceContext().getPropertyValue(STUDENTID);
   }

   @Accessor(qualifier = "studentID", type = Accessor.Type.SETTER)
   public void setStudentID(final String value)
   {
   getPersistenceContext().setPropertyValue(STUDENTID, value);
   }

   @Accessor(qualifier = "studentFirstName", type = Accessor.Type.GETTER)
   public String getStudentFirstName()
   {
   return getPersistenceContext().getPropertyValue(STUDENTFIRSTNAME);
   }

   @Accessor(qualifier = "studentFirstName", type = Accessor.Type.SETTER)
   public void setStudentFirstName(final String value)
   {
   getPersistenceContext().setPropertyValue(STUDENTFIRSTNAME, value);
   }

   @Accessor(qualifier = "studentLastName", type = Accessor.Type.GETTER)
   public String getStudentLastName()
   {
   return getStudentLastName(null);
   }

   @Accessor(qualifier = "studentLastName", type = Accessor.Type.SETTER)
   public void setStudentLastName(final String value)
   {
   setStudentLastName(value,null);
   }
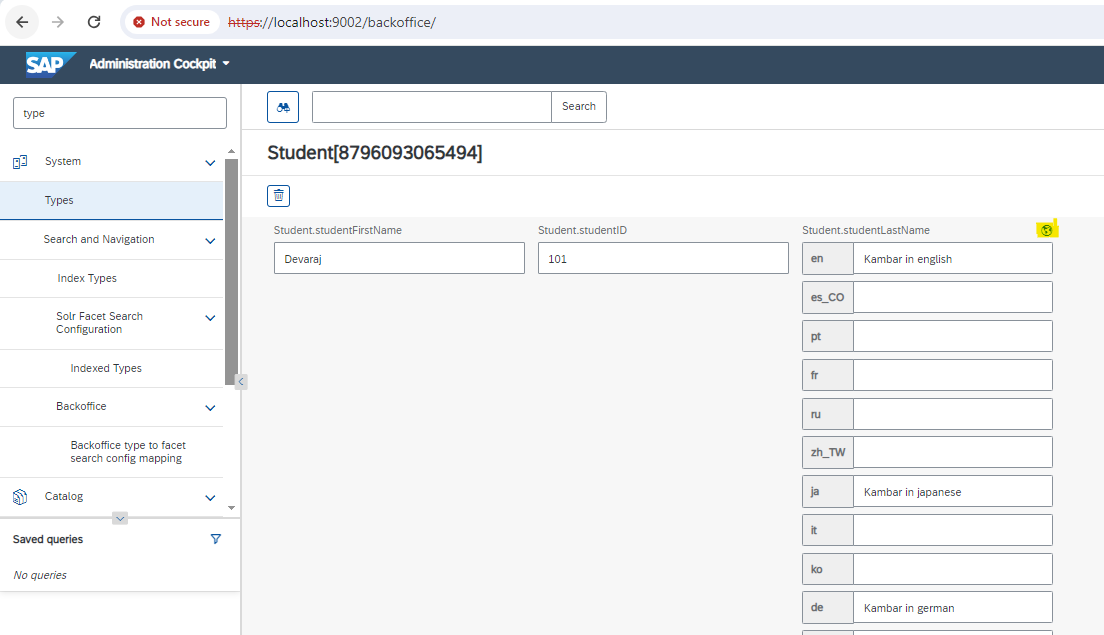
Go to Backoffice:
Types->Type “Student” in text box and click on search:

In the above image click on the highlighted symbol to open the type and show its records, and using this screen we can add the values for studentID, studentFirstName and studentLastName, edit , update or delete the records. Here we can observe that the below image there is additional symbol for the studentLastName it indicates that the attribute is localized and, When I click the below highlighted symbol we can see the text boxes for different languages. We can add the text for different languages and for the studentID, studentFirstName there is no symbol it means that attribute is not be localized.
Open the HAC and write the query to get the data:
Select * from {Student}
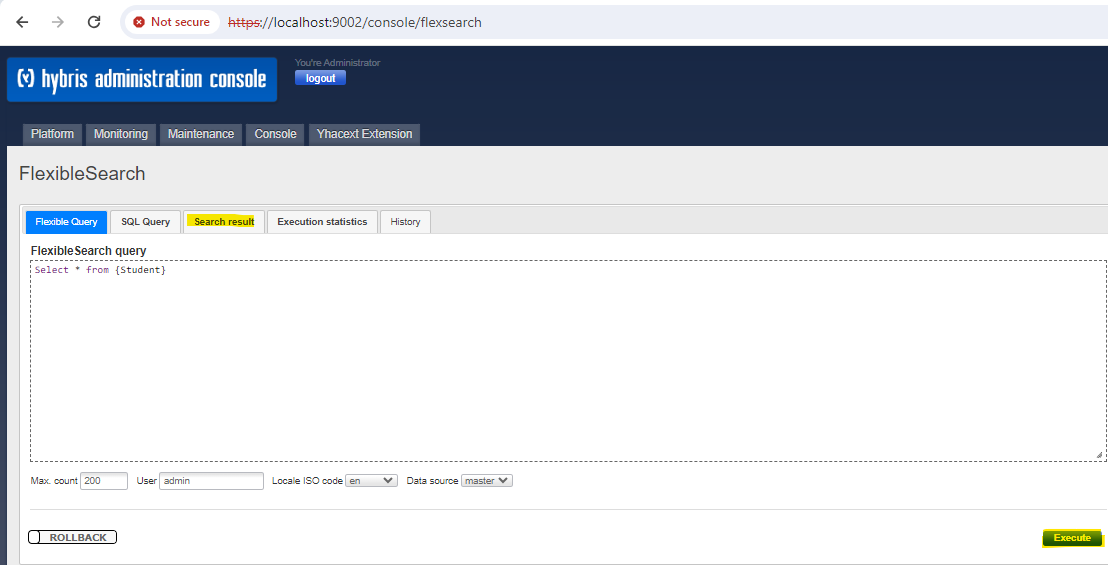
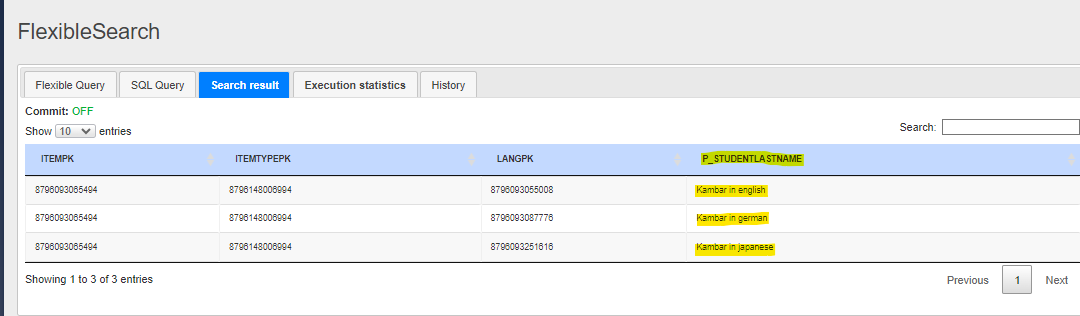
Click on Execute we can see the results in Search result tab.

Here we can observe that two attributes are displayed here that is studentID, studentFirstName and not attribute which is localized that is studentLastName. If I want see the studentLastName details then go to SQL Query Tab and write the query:
Select * from StudentDetailsl
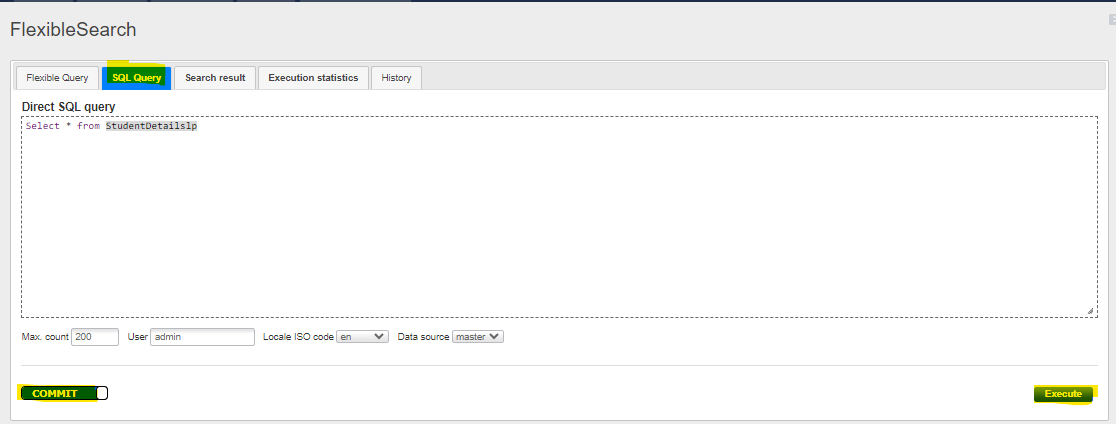
Click on Execute we can see the results in Search result tab.
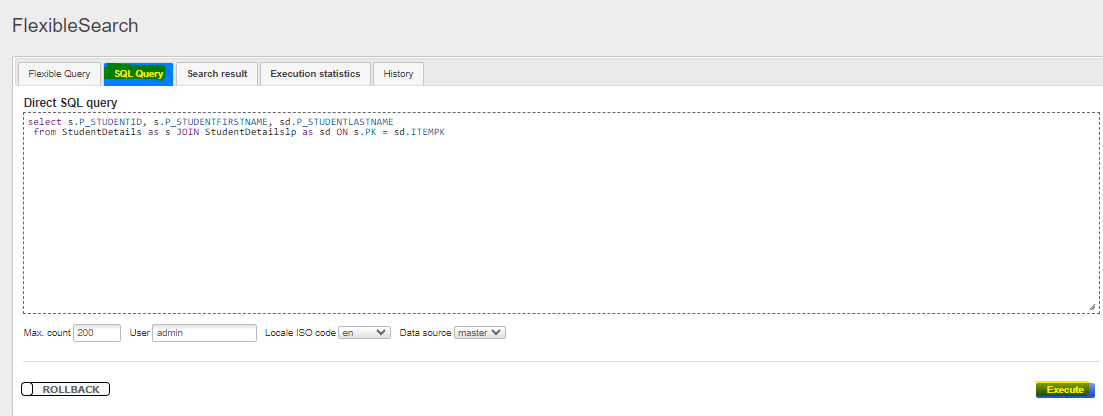
If we want to see both the attributes information in single query by then we need to write the same using the JOIN operation and it is written in SQL Query Tab.
Select s.P_STUDENTID, s.P_STUDENTFIRSTNAME, sd.P_STUDENTLASTNAME From StudentDetails as s JOIN StudentDetailslp as sd ON s.PK = sd.ITEMPK
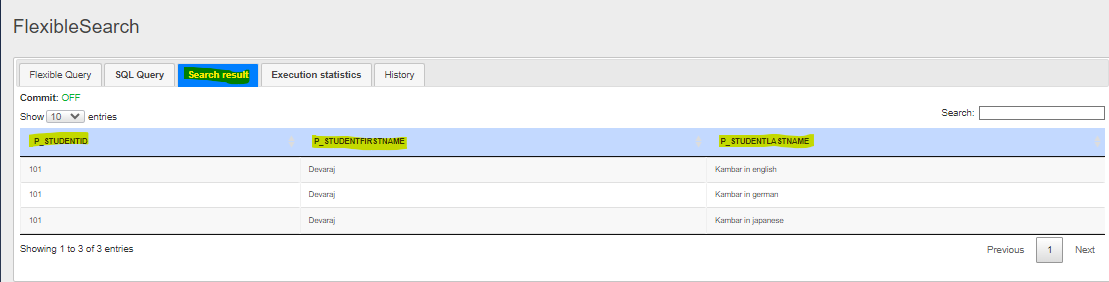
Click on Execute we can see the results in Search result Tab.
Implementation 2:
Add a new localized attribute in product itemtype and display the same on storefront.
Steps for Implementation 2:
1. Add a new localized attribute in product itemtype in *core-items.xml file.
After performing the above step do ant all (the corresponding setter and getter methods created in ProductModel) and start the server and, do the system update (the corresponding attribute will be created in product table).
2. Add the new attribute entry in ProductData in *façades-beans.xml file.
After performing the above step do ant all it will add new attribute in existing ProductData data class.
3. Create the populator.
4. Create a bean for the populator created in step 3 and add it the ProductConverter’s populator list be adding below in *facades-spring.xml file.
5. For display purpose in storefront we need to add the attribute in jsp file that is productDetailsPanel.tag
6. Go to Backoffice and add the values for that attribute in different languages.


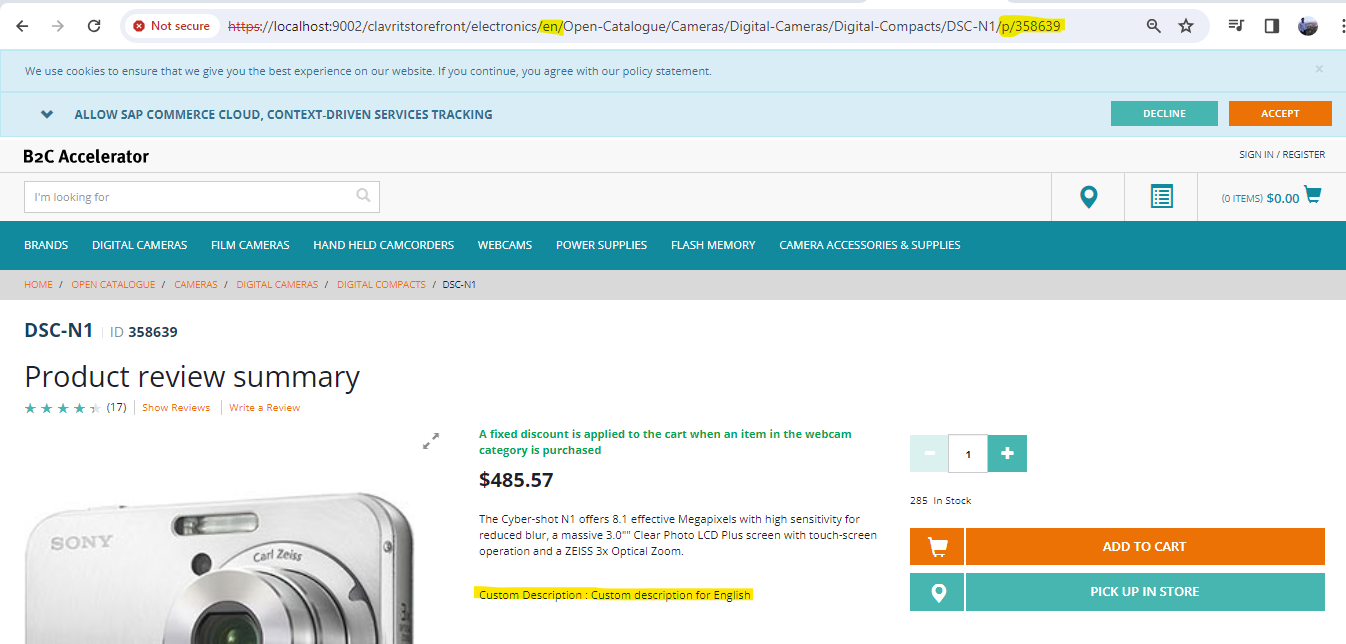
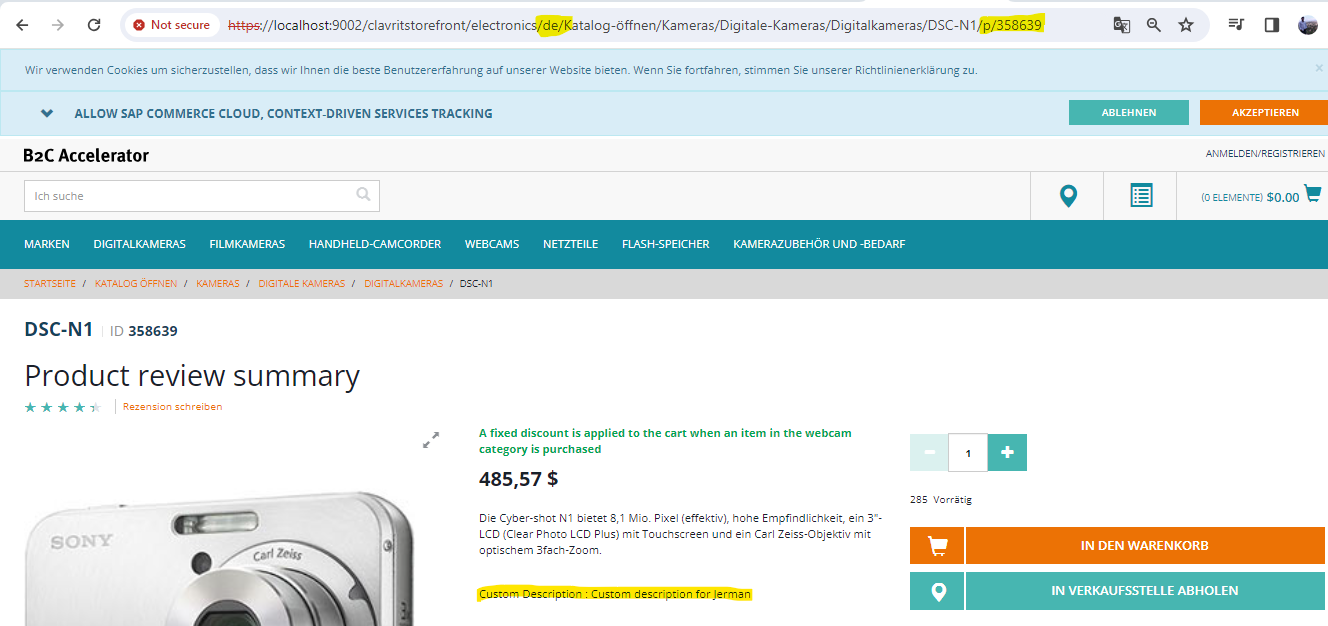
Outputs:
Output: English language.
Output: German language.
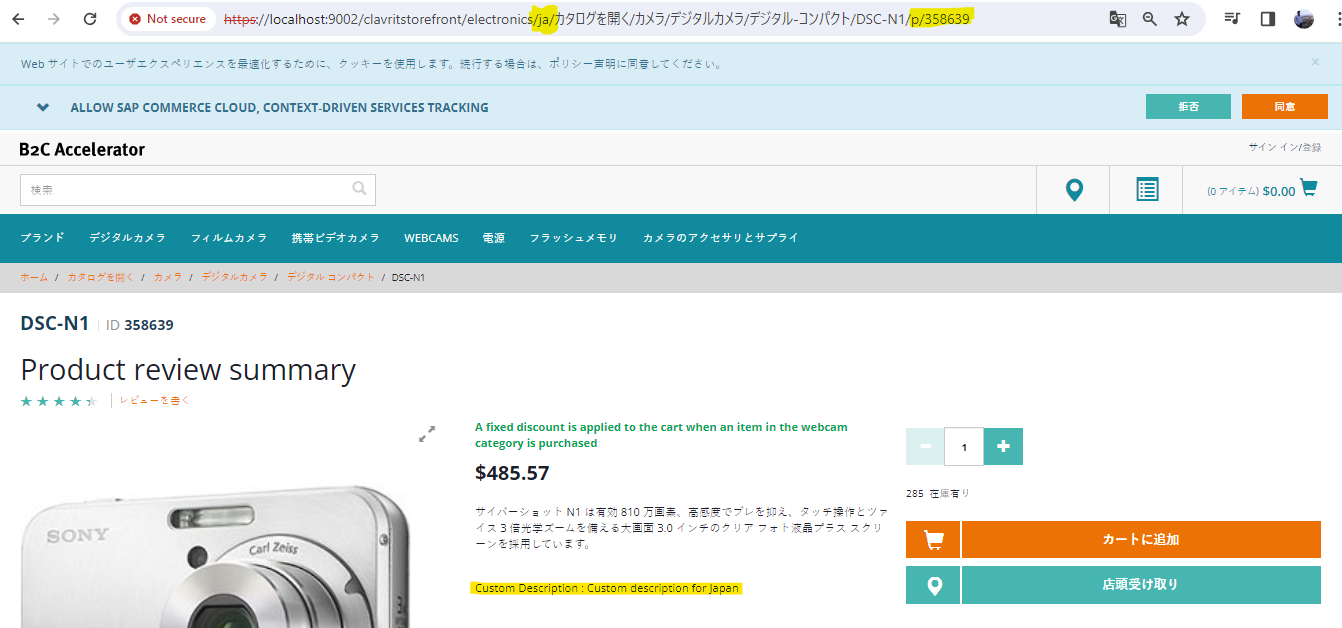
Output: Japanese language.